Tag Archives: how to guide

enable eSIM

How To Enable eSIM on Handset Like iPhone

Enabling eSIM (embedded SIM) depends on the device you have.

Here are some general steps to enable eSIM:

  1. Check if your device supports eSIM: Not all devices support eSIM. You can check your device’s manual, manufacturer’s website, or carrier’s website to see if your device supports eSIM.

2. Get an eSIM plan: You’ll need to get an eSIM plan from your carrier. The process of getting an eSIM plan may vary depending on your carrier.

3. Scan the QR code: After you’ve purchased an eSIM plan, you’ll receive a QR code from your carrier. Open the eSIM settings on your device and scan the QR code.

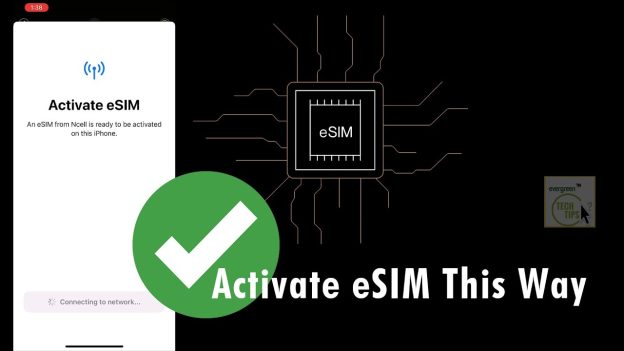
4. Follow the prompts: Your device will guide you through the process of activating the eSIM. You may need to enter some information, such as your phone number, to complete the activation process.

5. Set the eSIM as your default: Once the eSIM is activated, you can set it as your default SIM for voice, data, and messaging.

Keep in mind that the process of enabling eSIM may vary depending on your device and carrier. It’s best to consult your device’s manual or your carrier’s website for specific instructions.

Steps from our video tutorial:

1. Here, I have taken or purchased a Physical SIM on my name first from the mobile service provider by using my national identity card. Please follow the steps and regulations as per your countries’ regulations. After that, we have to activate the SIM card by inserting into our Phone’s SIM-card tray.
2. Ncell Axiata Limited is the first private mobile service provider operating in Nepal.
3. SIM activation done. Please recharge some balance in it too.
4. We are good too move ahead. Now lets call customer care or lets do an email to customer care (SIM Provider) to activate an eSIM service.
5. *#06# (Check if you have an EID on your handset by dialing this sequence on your dial pad of handset.)
6. If EID is there, congratulations your handset supports an eSIM feature.
7. After a call with customer care (SIM or mobile Provider), they verified my details and emailed me the steps to activate eSIM on my handset.
8. Please kindly enable WIFI while you setup eSIM. Now, eject your physical SIM card from your handset and follow the procedure that is told.
9. eSIM activated successfully. Enjoy 🙂
10. Now that I have activated eSIM, let me insert my second SIM from another mobile service provider. After that, I will have dual SIM service on my handset.

Connect Your Phone in Opera Browser

How To Connect Your Phone in Opera Browser?

Want to sync your opera browser in between PC or laptop and smartphone? It makes life easier and you can enjoy Opera browser on both devices. Today we will guide you steps on how to connect your phone in opera browser. Stick to the end. Besides, we have created video tutorial on that too. It will make more easier and authentic.

Steps To Connect Your Phone in Opera Browser:

Follow these exact steps.

Steps 1: First there you have to install Opera Browser on both of your PC and Smartphones.
Get Opera for PC Here
Get Opera for iPhone
Get Opera for Android

Step 2: Install opera on both devices and open them.
Here we will be showing the steps on Windows PC and iPhone.

Step 3: Go to Settings in your opera browser in an iPhone. Also, go to settings of opera on your PC and search for My Flow. If it is disabled, make sure you turned on the enabled option there.
“My Flow is your personal space for links, also for videos, or images and notes. You can have those on your computer and smartphone at the same time.”

Step 4: On PC Opera Browser, click on “connect your phone“. Similarly, on phone’s Opera Browser, tap on “Connect a Computer“.

Step 5: QR code will be shown on your desktop PC. Scan that QR from your phone’s browser that will activate your camera. Wait for while and your in both devices will be successful.

Hence, this way you will be able to connect your phone in Opera Browser. If this tech blog was helpful, you may share and show some love to us. Also for latest tech tutorial videos, you may subscribe to our channel.

You might be interested in: How To Update Your iPhone Software Faster (Update To New iOS)

Video Tutorial:

Solved Windows Update Error encountered 0x80070422

Windows Update Error encountered 0x80070422 Solved

You might face this issue Windows Update Error encountered 0x80070422 while you try to install software on your PC or Laptop. You won’t be able to install third party software as well as you won’t be able to update your Windows OS too. Hence, its a must that you have to solve this issue as soon as you can. But don’t worry, we are here for you. You will learn all step by step here to solve this Windows Issue.

Steps to solve Windows Update Error encountered 0x80070422 are as follows:

  • First Step: You need to tap on Windows icon and search for Windows Services “Services/App”. Open it normally or right click and Run As Administrator.
  • Second Step: Search for Windows Event Collector. Open it and set Startup Type Automatic and Tap on Start at Service Status. And Apply and OK Changes.
  • Step Three: Same steps again for Windows Event Log.
  • Step 4: Same steps again for Windows Update.

After you have followed all those steps, go to Windows Menu again and Search for Updates or Windows Update Settings. Tap on it and also tap on RETRY. Wait for a while. BOOM!! Windows Update is working Now.

Might Be Useful Too: 100 Percent Fix Installation failed: Destination folder already exists issue

Download and install multiple downloads and you are good to go. You might get multiple downloads, its better to download and install them all. Please note that Plugin the power cord if you are doing it in Laptop. Because, if the power goes off, your Windows might get crashed. Also, you must need speed internet and patience to do it. SSD C:Drive is highly recommended. It is fast in the SSD or Solid State Drive.

For your convenience, we have made a tech tutorial on it too. Visit our Channel Evergreen Tech Tips or watch the tutorial video below: