Want to learn how you can update iOS in an iPhone? We did the iOS update from 14.7.1 to 15.3.1 new version. You can do it as per your device capability. Make sure your phone has enough battery percentage or charge. Or, you can keep your charger plugged in. And, faster data or WIFI connected too.
Here’s how you can do it. Follow these exact steps to update your iPhone software faster:
Step 1: Search for Settings and tap on it. Step 2: Tap on iOS… Now Available. Step 3: Tap on Download and Install. To Do it, you may need to provide your Passcode. Step 4: Tap on Agree to agree the Terms and Conditions.
Now, the updates have been requested. Wait for a bit. New iOS Update Download Process Initiated. Wait for the approximate given time. Let us fast forward it for you. Preparing Update…. Wait for a bit.
It has been downloaded. Now, it will proceed for the installation process.
Step 5: Tap on Install Now.
It is verifying update… Wait for a bit. Please don’t panic. Display will turn it off and Phone will boot up. Wait until it boots up. Let us fast-forward it for you.
Congratulations. New iOS Update installation completed. Do initial setup and you are good to go. It took around 50 minutes for us. iOS update done and notification removed. To verify go to General and to About. This way you can update to new iOS on any of your iPhone device. New is better to keep your phone safer and smooth. If you have any confusion, you may comment down below, we will be guide you further. Or, if you are confused with any of the steps mentioned, you can see the tutorial video made by us for you from our Evergreen Tech Tips YouTube Channel.
Instagram is a popular Photo and Video sharing platform that is currently owned by Facebook. In short, it’s a social media platform that lets users edit their Medias with filters and upload them with hashtags. Similarly, users have the option to share those posts either privately or with some pre-approved followers.
Despite its popularity, there are many users that want to deactivate or delete their Instagram Accounts. And, studies also shows that Instagram has negative impact on people like Depression, Stress, Addiction, Anxiety, loneliness etc. So, it’s always a great idea to take a break from the platform to focus on our own end goals.
In this case, you have two options to take time away from the platform. First is to delete your Instagram account permanently. And, second is to only deactivate it temporarily to reactivate later on. If you choose the first option, you can’t recover your account and you need to start from the beginning. Similarly, the second option will only deactivate your account meaning you can always return when you feel like it. And, we’ll discuss about the process of Deactivating and Reactivating our Instagram account in this article.
Deactivate Instagram Account
Before we get started, you need to know that you can only deactivate your Instagram account from a browser. But, it works equally well on both mobile and desktop browsers. Note: deactivating your Instagram account will hide your profile from direct messages, comments, tags and others. Now, let’s get started.
Open your preferred browser either from a mobile or desktop and visit the Instagram website. You can access it easily through: instagram.com
Next, proceed to log into your Instagram account in the browser. Once logged in, go into your profile and choose the “Edit Profile” option given there.
Now, scroll down until you see the “Temporarily Disable My Account” in the list. Choose the said option and provide a reason for you leaving Instagram.
Finally, re-enter your Instagram password and confirm your choices. This will immediately hide your username and you’ve successfully deactivated your Instagram account.
Once you have deactivated your Instagram account, you can easily reactivate it again when you feel like it. Also, it doesn’t require you to follow any kinds of additional steps to do so. You simply just have to log into Instagram with your old ID and Password. And, this will immediately re-activate your Instagram account. Similarly, all your old data and groups are left intact meaning you can start where just where you left. Note: it’s important to know that you can’t reactivate a deleted Instagram Account.
SD Cards are one of the most accessible and cheap storage devices that are supported across a wide range of devices. Similarly, they come in many storage sizes and shapes that one can choose according to their needs and use cases. Also, their write and read speeds are pretty high and some even support the PCI and NVME interferences as well. Some of the most popular use cases of SD cards include in Cameras, Mobile devices, Laptops, handhelds etc.
Say you just found the perfect SD Card for your device but later found out that you can’t write anything in it. It’s called Write Protection and it can be pretty frustrating as you can’t add or remove things from your SD-Card. Fortunately, it’s easily fixable and we’ve listed the most popular methods that you can use to solve the issue. Let’s get started.
Remove Write Protection from SD Card As Follows:
Check and Toggle the Physical Switch
The first thing that you need to check when you encounter this issue is to check the physical switch found in your SD Card. And, all SD cards come with this Physical Switch that acts as a locking mechanisms for your data. Now, just remove your SD Card and search for its physical switch. Here, you need to make sure that the slider is at the Top far away from the “Lock” marking. Once you’ve confirmed that, simply insert your SD Card again and this should have fixed your Write Protection problem.
Check its Properties
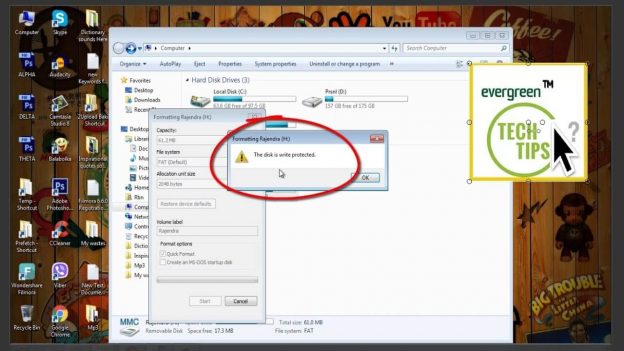
Some SD Cards in Windows have a special Write Protection toggle that locks it from any changes. Now, this setting is disabled from factory but you might’ve enabled it accidently. Simply go into the File Explorer and right click your SD Card to check its properties. Here, check if the toggle for Write Protection and disable it if it’s enabled. This will instantly solve your problem. Note: – only Some SD Cards have this option for Windows so don’t worry if you can’t find the option for yours.
This is the final method that you can use to remove Write Protection if the above methods fail for you. To start, you’ll need a Windows PC or Laptop and signed into the Administrator Account. Next, insert your SD card into the Laptop and follow the steps shown hereafter:
Right click on the start menu and open the “Command Prompt” as an administrator. Also, you can search for “Command Prompt” from the Windows Search as well.
Once loaded, enter this command: diskpart and hit enter. Now, confirm the app dialogue that follows.
In diskpart, enter: list disk This will immediately show all disks connected to your PC. After that, you need to find and verify your SD Card from the available disks. Usually, it’s at the last and has the lowest storage space in the list.
Now, enter the command: select disk “number” in the command prompt. Here, replace the “number” according to your SD Card’s number i.e. 1,2,3,4 etc. For example: – enter command “select disk 4” if your SD Card is labelled as Disk 4.
Finally, enter the command: attributes disk clear read-only and wait for the process to complete. You should see the “Disk attributes cleared successfully” message once the process completes. And, you should’ve successfully removed Write Protection from your SD card.
Also, Video Tutorial to remove SD Card Write Protection Error:
Instagram is a popular Photo and Video sharing platform that was initially released back in 2011. And, its popular today for the ability to upload and edit media’s with many built-in filters to alter their look and feel. Similarly, it also allows users to organize and browse their contents through Hashtags and geographical tagging’s. All in all, it’s one of the most popular social media platform till date.
To begin, all modern smartphones both running iOS and Android will automatically update their apps in the background. But, they also provide users option to turn this feature completely off from their settings. After that, users will need to manually update each app from their respective App store. For iOS users it’s literally called the App Store and for Android users, it’s known as the Google Play Store. Now, if you don’t know how to update your Instagram App then we’ve got you covered. In this article, we’ll discuss about the ways through which you can update your Instagram app for both Android and iOS devices. Let’s get started.
Instagram Update Steps For Android
The general process for updating the Instagram App is similar for all Android version released till date. However, if your device is ancient then you may face problems while updating the App. Here, the best solution is to update the Android version of your old device or use a custom rom. With that out of the way, let learn how you can manually update the Instagram app on your Android Device.
The first step is to open the Google Play Store in your Android device. It comes pre-installed on all android device unless your manufacturer chooses not to do so. And if you can’t find it, open your devices alternative App store. This process can also work for such third party app stores.
Next, search for the “Instagram” at the search bar located at the top of the Google Play Store. You’ll also need to do the same on your third party app store at its search bar. After that, wait for the app list to load on your App store.
Here, you can see the Instagram App at the top of the lists and the Update button right beside it. Now, you just need to click on it to start the updating process. Also, you may need to click on the App itself to see the update icon on third party app stores. Note:- you’ll see the “Open” icon instead of the “Update” one if your Instagram App is already up to date.
Also, you can download the .apk file of Instagram from third party websites like Uptodown, Aptoide etc. and side-load it to update your app.
The process to update the Instagram app on your iOS device is also similar to the process in Android devices. Here, it’s advised that you update your iPhone to its latest supported version before you proceed. This guarantees maximum compatibility for the app and your device. Now, let’s learn you to update the Instagram App.
Similar to Android, the first step is basically to open the App Store on your iOS device.
Next, tap into the search button and search for the “Instagram” App. Here, you may have to wait for a few seconds until the App lists get populated.
Now, Tap the Instagram App from the list and click on the “Update” icon right beside it. Note: – you will see the “Open” icon instead of the “Update” one if your App is already up to date.
Finally, wait for the process to complete and you’ve successfully updated your Instagram App.
This way you can update Instagram app on any of your smart devices.
Also, video tutorial that will step by step guide you to update your existing Instagram App:
There are many Facebook Tips and Guides that you can learn. However, today in this article we’ll learn about the ways that we can see Photos liked by someone on Facebook in this article.
Facebook is one of the biggest social media platforms in the World that was founded in 2004 and is currently owned by Meta Platforms. Similarly, it’s also very popular and has an estimated 2.8 billion monthly active users in the platform. And, the reason is pretty simple as it’s easily accessible from any device that has an internet connectivity.
To get started in Facebook, individuals need to exceed 13 years of age and have a device capable of internet connectivity. Next, they can open the official Facebook website and proceed to create a new account for themselves. And, you’ll need to provide your basic information’s like name, age, contact information’s etc. to successfully register your account.
Once done, users have the ability to post photos/videos, texts, multimedia’s etc. that is shared with other users. Here, “Other Users” simply means other Facebook users that have agreed to be your friend on Facebook. Also, your posts are available to other people according to your privacy setting who aren’t currently on your friends list. Similarly, Facebook friends can directly chat together through the Facebook messenger, join groups, receive notifications, follow pages etc.
Now that we’ve started with Facebook, let’s learn about some of the Facebook tips and Guides to familiarize ourselves.
How To See Photos Liked by Someone On Facebook? Let’s learn the steps below:
Unfortunately, Facebook has removed the option that lets users see what other users have liked on Facebook. But, you can still view some of their liked photos and videos from their profile. Mostly it includes pages and posts in general. However, your Facebook friend must have unlocked their account for this method to work. With that out of the way, let’s get started.
Open the Facebook App on your mobile device or go to the Facebook website from your browser in your PC. Next, log into your own account and search for your friend’s profile.
After that, open their Facebook profile and you should see their recent posts and activities. Here, we need to click on “See (name’s) about info” from the mobile App or “More” from the desktop browser.
Next, scroll down and tap the “See All” or “Right Arrow” option once shown on the mobile app. For desktop users, click on the “Likes” from the drop down menu from the “More” options. This should successfully display all their liked pages, TV shows, Posts, Books etc. for you to see.
Finally tap “All Likes” on mobile app and you can view all their liked TV shows, Posts, Books, restaurants etc. This way, you can learn more about them and converse with them easily.
iCloud is a cloud storage and computing service from Apple Inc. that was first started back in 12th October, 2011. Currently, it’s estimated that the service has more than 850 million users globally and is one of the most popular Apple services. For the most part, it’s available for all Apple users through their Apple ID. And, it allows users to store their important data like photos, Documents, music etc. on Apple’s remote servers. Hence, it comes in handy in case of data loss or any other mishaps.
There are many reasons for which someone might want to change their iCloud Email addresses. Sometimes, it’s due to work while other time it’s due to personal reasons. Regardless, there are many reasons where someone might want to change their iCloud Email addresses. And, it might cause many headaches to the users in the process to do so.
Fortunately, Apple has made the process of changing your iCloud Email addresses a fairly easy one. You simply need to change your Apple ID email address to change your iCloud Email. As it’s linked to your Apple ID. And, we’ve listed some easy steps guiding you to do just that. Read till the end to learn just how you can easily change your iCloud Email address. Let’s get started.
iCloud Email Address Changing Steps:
For you to change your iCloud Email Address, you’ll need to visit the official Apple ID website and Sign in. So, you need a decent internet connection and a device capable of visiting the said website. Once done, you can proceed to follow the steps shown hereafter:
Once signed in, Tap on the “Edit” icon next to the account section on the Apple ID website. This section will provide us the option to change various properties of our Apple ID.
After that, click on the hyperlink shown as “Change Apple ID” on the top of the account menu. This will show a new popup that will ask you to enter a new email address for your Apple ID.
Simply enter your new email address on the black space and click on continue. Here, you might want to check for a verification code if you just changed your email address into a non-Apple one. Also, you’ll be prompted to enter the said code as well. Enter it to save your changes.
Once done and verified, proceed to the iCloud website at: https://www.icloud.com/ and sign in with your new email address. You’ve successfully changed your iCloud Email Address if you can sign into your iCloud with your new email address.
Let’s Fix Windows Was Unable To Connect To The Selected Network Together. We will go through step by step guide or follow the video tutorial given below.
Windows as we all know is one of the best desktop operating system to use in our computers. It’s regularly updated and has many features that make performing our day to day task easier. Similarly, it also supports a wide range of hardware’s and you can run in almost anything. And, it alone occupies around 31% of the Global Operating Market Share.
However, Windows is not perfect and there are many bugs and errors that can arise on a Windows Device. And the “Windows was Unable to Connect to the Selected Network” is one of the most common one. Likewise, there are many reasons that contribute to the said error. Some of the most common causes include: Outdated Drivers, Buggy Updates, Malware infected Files, Physical damages etc.
If you’re encountering the same issue on your device, then worry not. In this article, we’ve listed some of the best solutions that you can use for the error. Also, it’s possible that a solution that worked for others might not work out for you. So, it’s advised that you go through the whole article and find the best solution for you. Now, let’s get started.
Steps To Fix Windows Was Unable To Connect To The Selected Network:
Forget the Network and Reconnect
Sometimes the changes made in our network can make windows unable to connect to the internet. Similarly, these changes can be done ourselves or from our Network providers. Either way, this can bring forth the above error. In this case, you can simply forget your current network and reconnect it to see if it fixes the error. Simply head into Settings>Network & Internet>Wi-Fi>Manage Known Networks> (choose your network and click on Forget). After that, simply try reconnecting to the network and see if the issue still exists.
Update/Uninstall Network Driver
Some users have also found that the issue arises from an incompatible or faulty network drivers. Here, the fix is simple and you only have to uninstall/update your current network drivers. The process if fairly simple and anyone can do it easily through the steps shown below.
Press “Windows + X” on your keyboard and open the Device Manager from the listed options.
Now, click on Network Devices on the Device Manager. After that, right click on the Wireless driver and “Update or Uninstall” device. It’s advised to first try updating your device before you Uninstall it.
Finally, just re-install your network drivers and see if that fixes the issue.
Windows has a handy Network Reset feature that will reset your network preferences to its defaults. This can sometime solve your network error as it fixes the incorrect network parameters set on your device. Simply head into Settings>Network & Internet>Status>Network Reset to reset your network to factory settings. Now, see if that fixes your connection error problem.
Run Troubleshooter
Some of you already know or have used Windows Troubleshooter for all of your problems in Windows. And, you can also solve your connection problem of your device straight from the Troubleshooter. For the most part, it automatically detects and solve all issues on our devices. Now, you just need to head into Settings>Network & Internet>Status>Network Troubleshooter to access it. Finally, open it and wait for the process to complete. This should successfully fix the network issue on your device.
Video Tutorial (Step By Step Guide To Solve This Issue):
Universal Analytics will no longer process new data in standard properties beginning July 1, 2023. Prepare now by setting up and switching over to a Google Analytics 4 property.
We have created tutorial video on that how you can setup New Google Analytics 4. Go Check out in our another video or Evergreen Tech Tips Blogs Post. Also, we will put a video in it here in the post as well. Today, we will guide you how you can explore old Google Analytics Data and Export them.
To Explore Old Google Analytics Data and Export Them, please follow the steps mentioned below:
Step 1: Go to link and visit analytics.google.com/analytics/web and login to you proper linked Gmail account. 2nd Step: After that select your Analytics Account>Properties & Apps and All Website Data Step 3: As shown in the video you can now go to Sections Audience, Attribution, etc. Step 4: Filter or select date as per your need. Here, we are sorting out since the website was launched from Custom option. 2nd Last Step: After the data load finishes, tap on export. There you can export in different formats like PDF, Google Sheets, Excel XLSX or CSV.
Similarly, you can download all other section report. Final Step: Go check out and explore your downloaded file and keep it safe for future use.
Also, we have covered the videos showing you all the step by step guide. Go check out.
This way, you can view or explore all you old Universal Analytics of any website. And, you can export those reports in any format you like. In the mentioned video, we have exported the report since beginning to a PDF format. You can export the Old Google Analytics Data in any other formats like CSV or excel.
Hope this tutorial was helpful for you. We will cover new useful tech tutorial guide and tips on next topic soon. You may subscribe our YouTube Channel Evergreen Tech Tips too for the latest tech videos.
Almost everyone at some point has or wanted to block someone through their iPhone for various reasons. And, many people still wonder what would happen to those people after we’ve blocked them. So, we’ve created a simple article to teach you on “How to block someone?” and what happens afterwards. Let’s get started.
Blocking Someone on Your iPhone:
For starters, your iPhone doesn’t care about the person that you’re blocking. It’ll completely shut their number from reaching our device through Text Messages, Calls, FaceTime and others. However, those users can still contact us through third party Apps like Instagram, Twitter, and Facebook etc. Here, you need to manually block them from these apps to stop them from reaching out to us. As such, they are a talk for a separate time. In the meantime, let’s learn about the steps through which we can block someone from our device.
The steps for blocking any number on your iPhone is pretty easy and straight forward. Simply, locate the number that you want to block from your recents or contact lists. Next, click on the info button shown at the right side of that number. After that, scroll down to the bottom and choose the “Block this Caller” option. Here, the iPhone will prompt you to verify the block and you simply have to select “Block Contact” to finalize your Block. This will immediately block that particular number from contacting you in your iPhone.
What happens When You Block Someone on Your iPhone?
A blocked number can experience different results based on the app used to contact you. Similarly, the blocked number will not know that they are blocked. Generally, they only experiences strange instances when they try to contact you on your iPhone. Some of the most common effects of a “Block” are listed hereafter:
Text Messages
When a blocked contact texts you on your iPhone, their messages are sent but you won’t receive them. Similarly, they also won’t get any notification for read or delivered for their texts. Likewise, you also can’t see or reply to those texts from your iPhone.
FaceTime is another app that is affected through the “Block” that you set for a particular number. Now, a Blocked contact will experience an endless ring without any answer when they try to contact us. Also, we won’t get any notifications and the FaceTime will continuously ring until they give up on their calls.
Calls
A blocked number’s call on our iPhone will immediately redirect into our Voicemails. It’s their only clue that they are blocked and they may experience as if our iPhones are turned off. As such, they can leave a voicemail but it won’t show as our regular messages. Instead, we’ve to manually scroll to the bottom of the Voicemail window> Blocked Messages to access them.
You might face this issue Windows Update Error encountered 0x80070422 while you try to install software on your PC or Laptop. You won’t be able to install third party software as well as you won’t be able to update your Windows OS too. Hence, its a must that you have to solve this issue as soon as you can. But don’t worry, we are here for you. You will learn all step by step here to solve this Windows Issue.
Steps to solve Windows Update Error encountered 0x80070422 are as follows:
First Step: You need to tap on Windows icon and search for Windows Services “Services/App”. Open it normally or right click and Run As Administrator.
Second Step: Search for Windows Event Collector. Open it and set Startup Type Automatic and Tap on Start at Service Status. And Apply and OK Changes.
Step Three: Same steps again for Windows Event Log.
Step 4: Same steps again for Windows Update.
After you have followed all those steps, go to Windows Menu again and Search for Updates or Windows Update Settings. Tap on it and also tap on RETRY. Wait for a while. BOOM!! Windows Update is working Now.
Download and install multiple downloads and you are good to go. You might get multiple downloads, its better to download and install them all. Please note that Plugin the power cord if you are doing it in Laptop. Because, if the power goes off, your Windows might get crashed. Also, you must need speed internet and patience to do it. SSD C:Drive is highly recommended. It is fast in the SSD or Solid State Drive.
For your convenience, we have made a tech tutorial on it too. Visit our Channel Evergreen Tech Tips or watch the tutorial video below: